2024-12-25
Docker Swarm 是 Docker 官方的集群管理工具,但是在 2021 年就已经宣布停止维护了。本文介绍了如何使用 Docker Context、Docker Stack、Traefik 来替代 Docker Swarm。
连接到远端 Docker
docker context create pi --docker host=ssh://pi@raspberrypi.local
pi
Successfully created context "pi"
docker context help
docker context use pi
docker container ls
CONTAINER ID   IMAGE                    COMMAND     CREATED         STATUS          PORTS                                       NAMES
06f944077da8   portainer/agent:2.17.1   "./agent"   19 months ago   Up 13 minutes   0.0.0.0:9001->9001/tcp, :::9001->9001/tcp   portainer_agent
初始化 Docker Swarm
docker swarm init
Swarm initialized: current node (zsur83mlghr1rkw2x4tkis4t3) is now a manager.

To add a worker to this swarm, run the following command:

    docker swarm join --token SWMTKN-1-2jv4vcpdwloxqsc09lfd4laiq8f7mwawgskwof3rne2ygc11hs-0c1z9d32041fl51nyxks6x34l 192.168.51.173:2377

To add a manager to this swarm, run 'docker swarm join-token manager' and follow the instructions.
version: '3.8'

services:
  whoami:
    image: traefik/whoami:latest
    deploy:
      replicas: 3
      resources:
        limits:
          cpus: '0.5'
          memory: 128M
      restart_policy:
        condition: on-failure
    ports:
      - "8080:80"
docker stack deploy -c docker-compose.yml whoami
Since --detach=false was not specified, tasks will be created in the background.
In a future release, --detach=false will become the default.
Creating network whoami_default
Creating service whoami_whoami
curl http://192.168.51.173:8080/
curl http://192.168.51.173:8080/
Hostname: 65aba8c52b5e
IP: 127.0.0.1
IP: 10.0.0.4
IP: 172.19.0.3
IP: 10.0.1.3
RemoteAddr: 10.0.0.2:50545
GET / HTTP/1.1
Host: 192.168.51.173:8080
User-Agent: curl/8.7.1
Accept: */*
安装 Traefik 网关
发布第一个 Service
使用私有仓库
把 docker-compose.yml 文件中的 image 改成私有镜像:
version: '3.8'

services:
  whoami:
    image: registry.cn-hangzhou.aliyuncs.com/knowuv/myweb:fe
    deploy:
      replicas: 3
      restart_policy:
        condition: on-failure
    ports:
      - "9090:3000"
docker stack deploy -c docker-compose.yml myapp --with-registry-auth
Since --detach=false was not specified, tasks will be created in the background.
In a future release, --detach=false will become the default.
Creating network myapp_default
Creating service myapp_myapp
docker service ps myapp_myapp
通过 IP 访问:

添加数据库密码
略
负载均衡
计算机的三要素:计算、存储、传输,集群的本质就是管理这三要素,然后让使用者不需要操心这些细节。
这一小节我们来讲解如何使用 Traefik 来做负载均衡,解决传输问题。
安装 Traefik
version: '3.8'

services:
  reverse-proxy:
    image: traefik:v3.2
    command:
      - --api.insecure=true
      - --providers.docker=true
      - --accesslog.fields.names.StartUTC=drop
      - --accesslog.fields.names.StartLocal=Asia/Shanghai
    ports:
      - "80:80"
      - "443:443"
      - "8080:8080" # The Web UI (enabled by --api.insecure=true)
    volumes:
      - /var/run/docker.sock:/var/run/docker.sock

networks:
  default:
    external: true
    name: traefik
docker stack rm whoami  # 移除之前测试的stack
docker network create --driver overlay traefik
docker stack deploy -c gateway-stack.yml gateway
第一次需要稍等一会,镜像下载结束后就会看到运行状态:
docker service ps gateway_reverse-proxy
ID             NAME                      IMAGE          NODE          DESIRED STATE   CURRENT STATE           ERROR     PORTS
vfjt84emp1i1   gateway_reverse-proxy.1   traefik:v3.2   raspberrypi   Running         Running 5 seconds ago
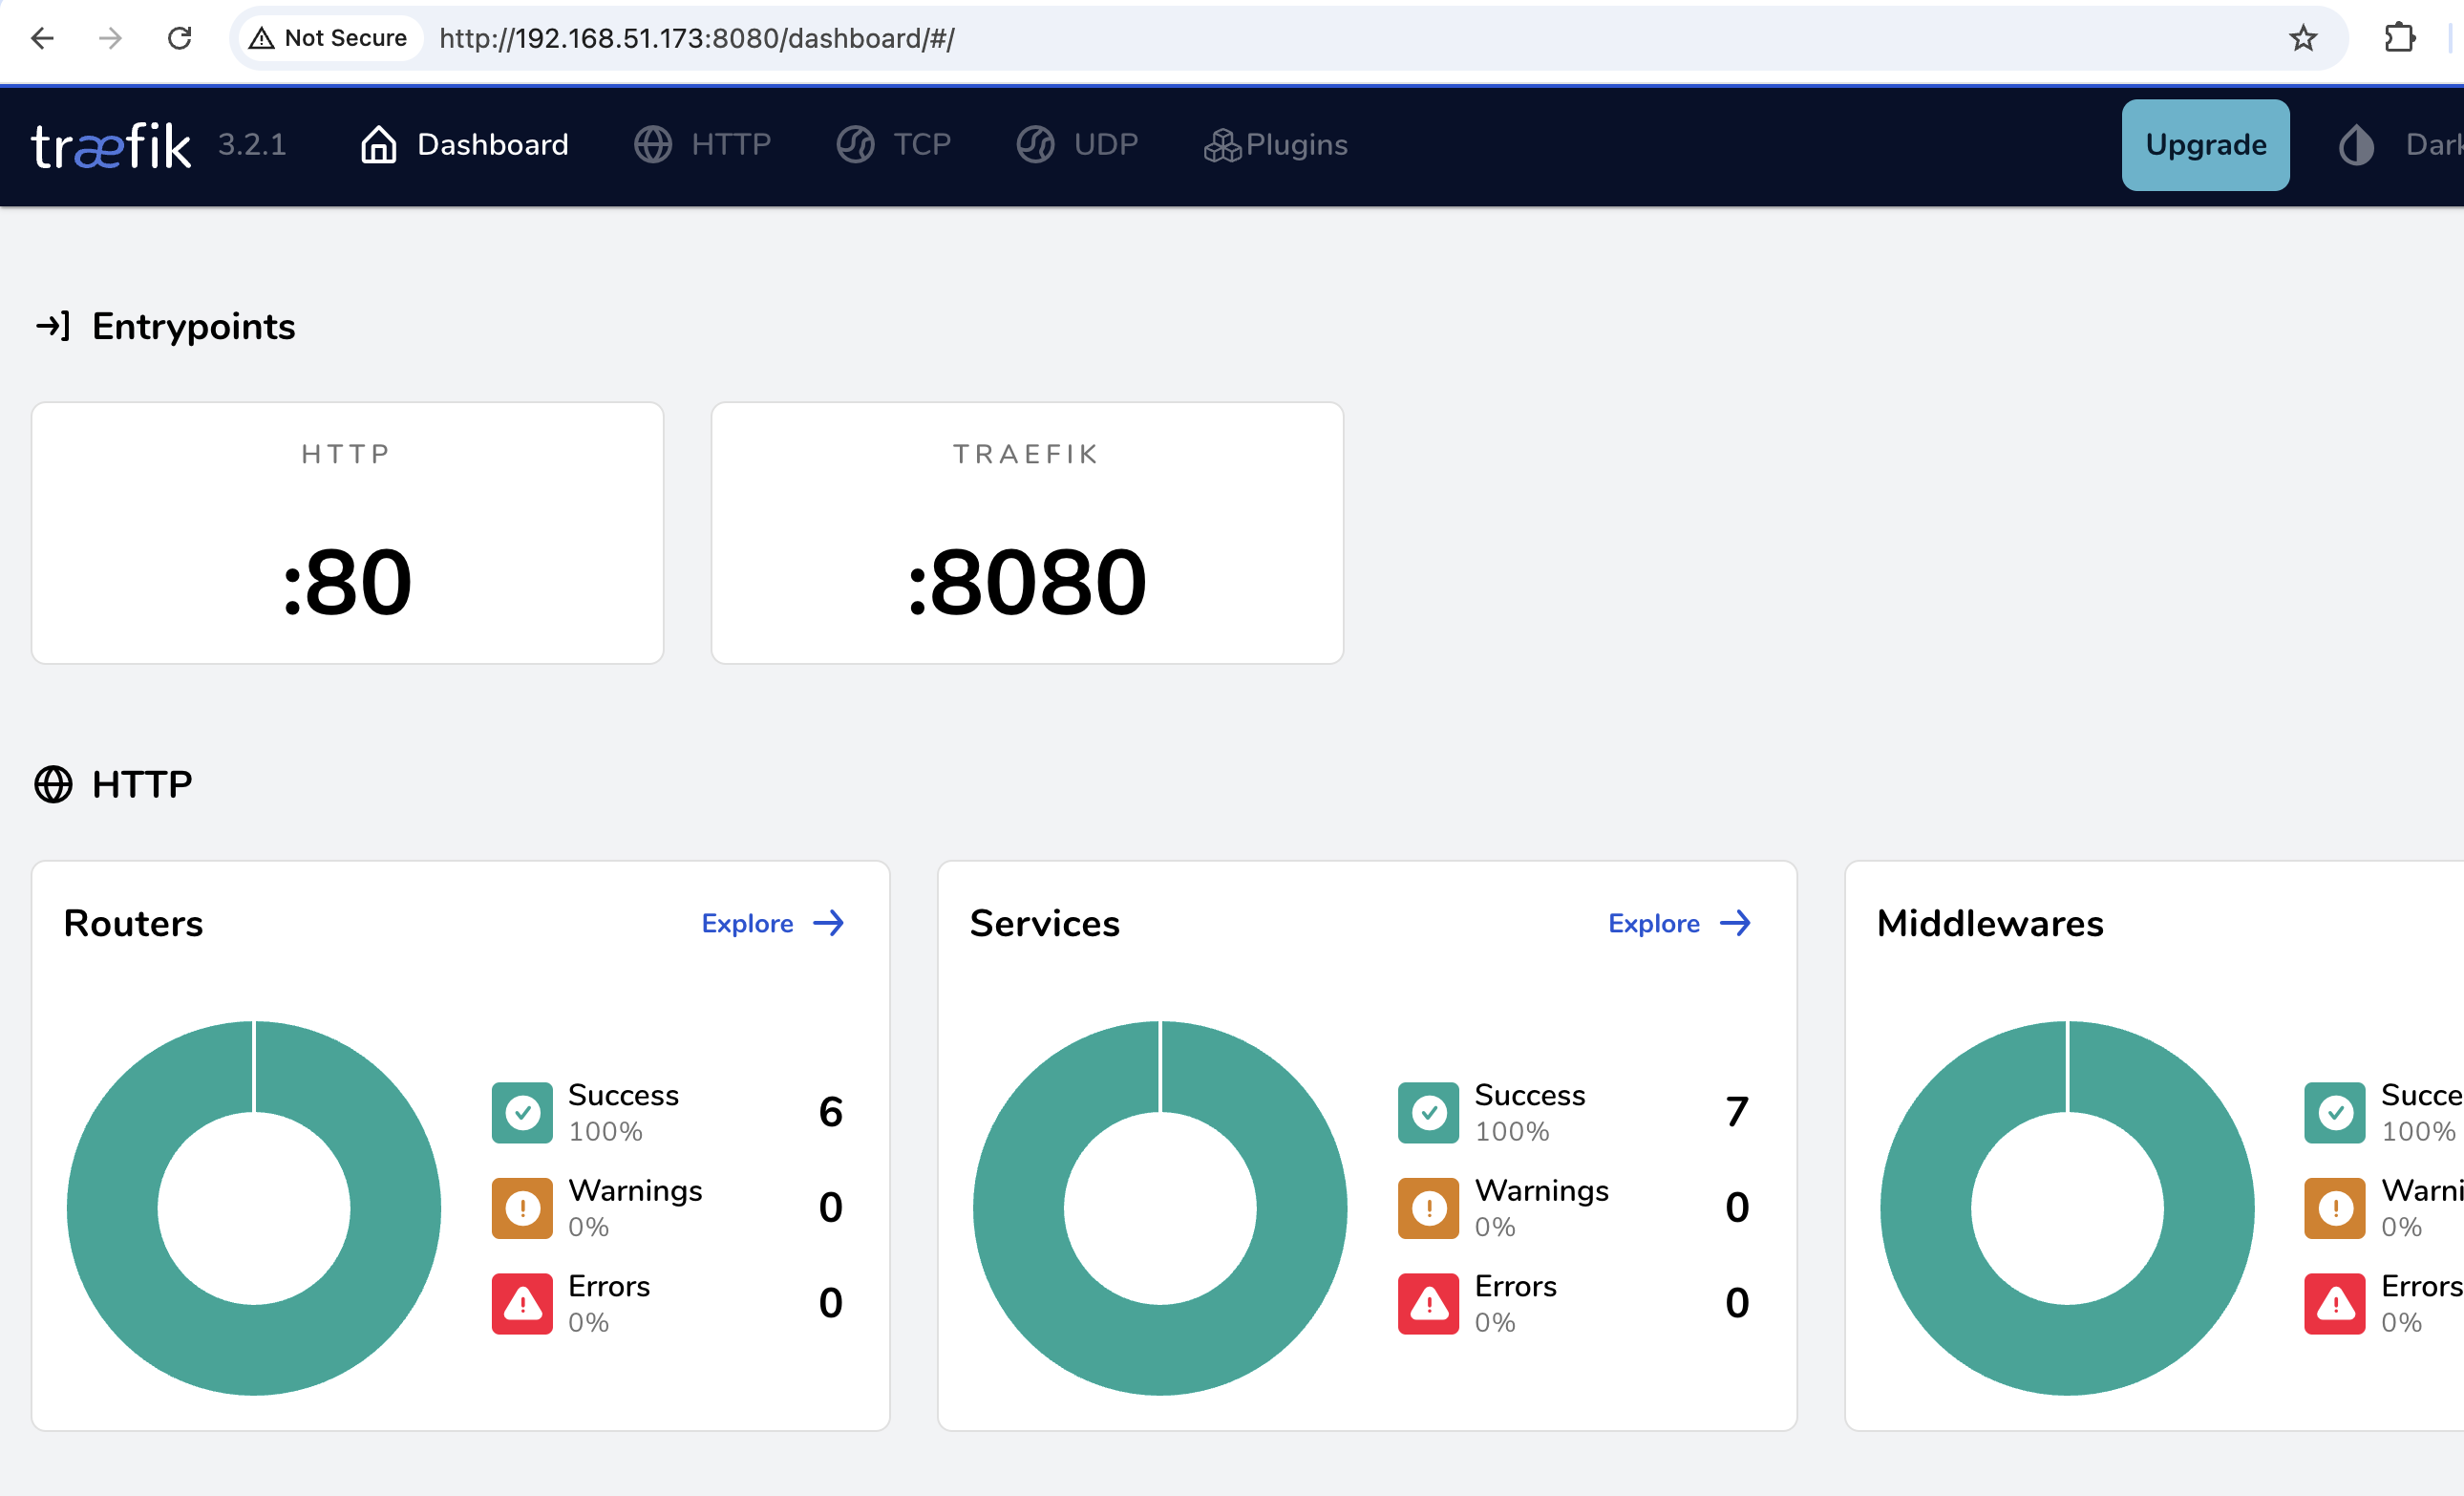
这个时候访问 http://192.168.51.173:8080/dashboard/#/ 就会看到 traefik 网关的页面。
服务发现
version: '3.8'

services:
  whoami:
    image: traefik/whoami:latest
    deploy:
      replicas: 3
      restart_policy:
        condition: on-failure
      labels:
        - "traefik.enable=true"
        - "traefik.http.routers.whoami.rule=Host(`raspberrypi.local`)"
        - "traefik.http.routers.whoami.service=whoami"
        - "traefik.http.services.whoami.loadbalancer.server.port=80"
networks:
  default:
    external: true
    name: 'traefik'
docker stack deploy -c myapp-stack.yml myapp
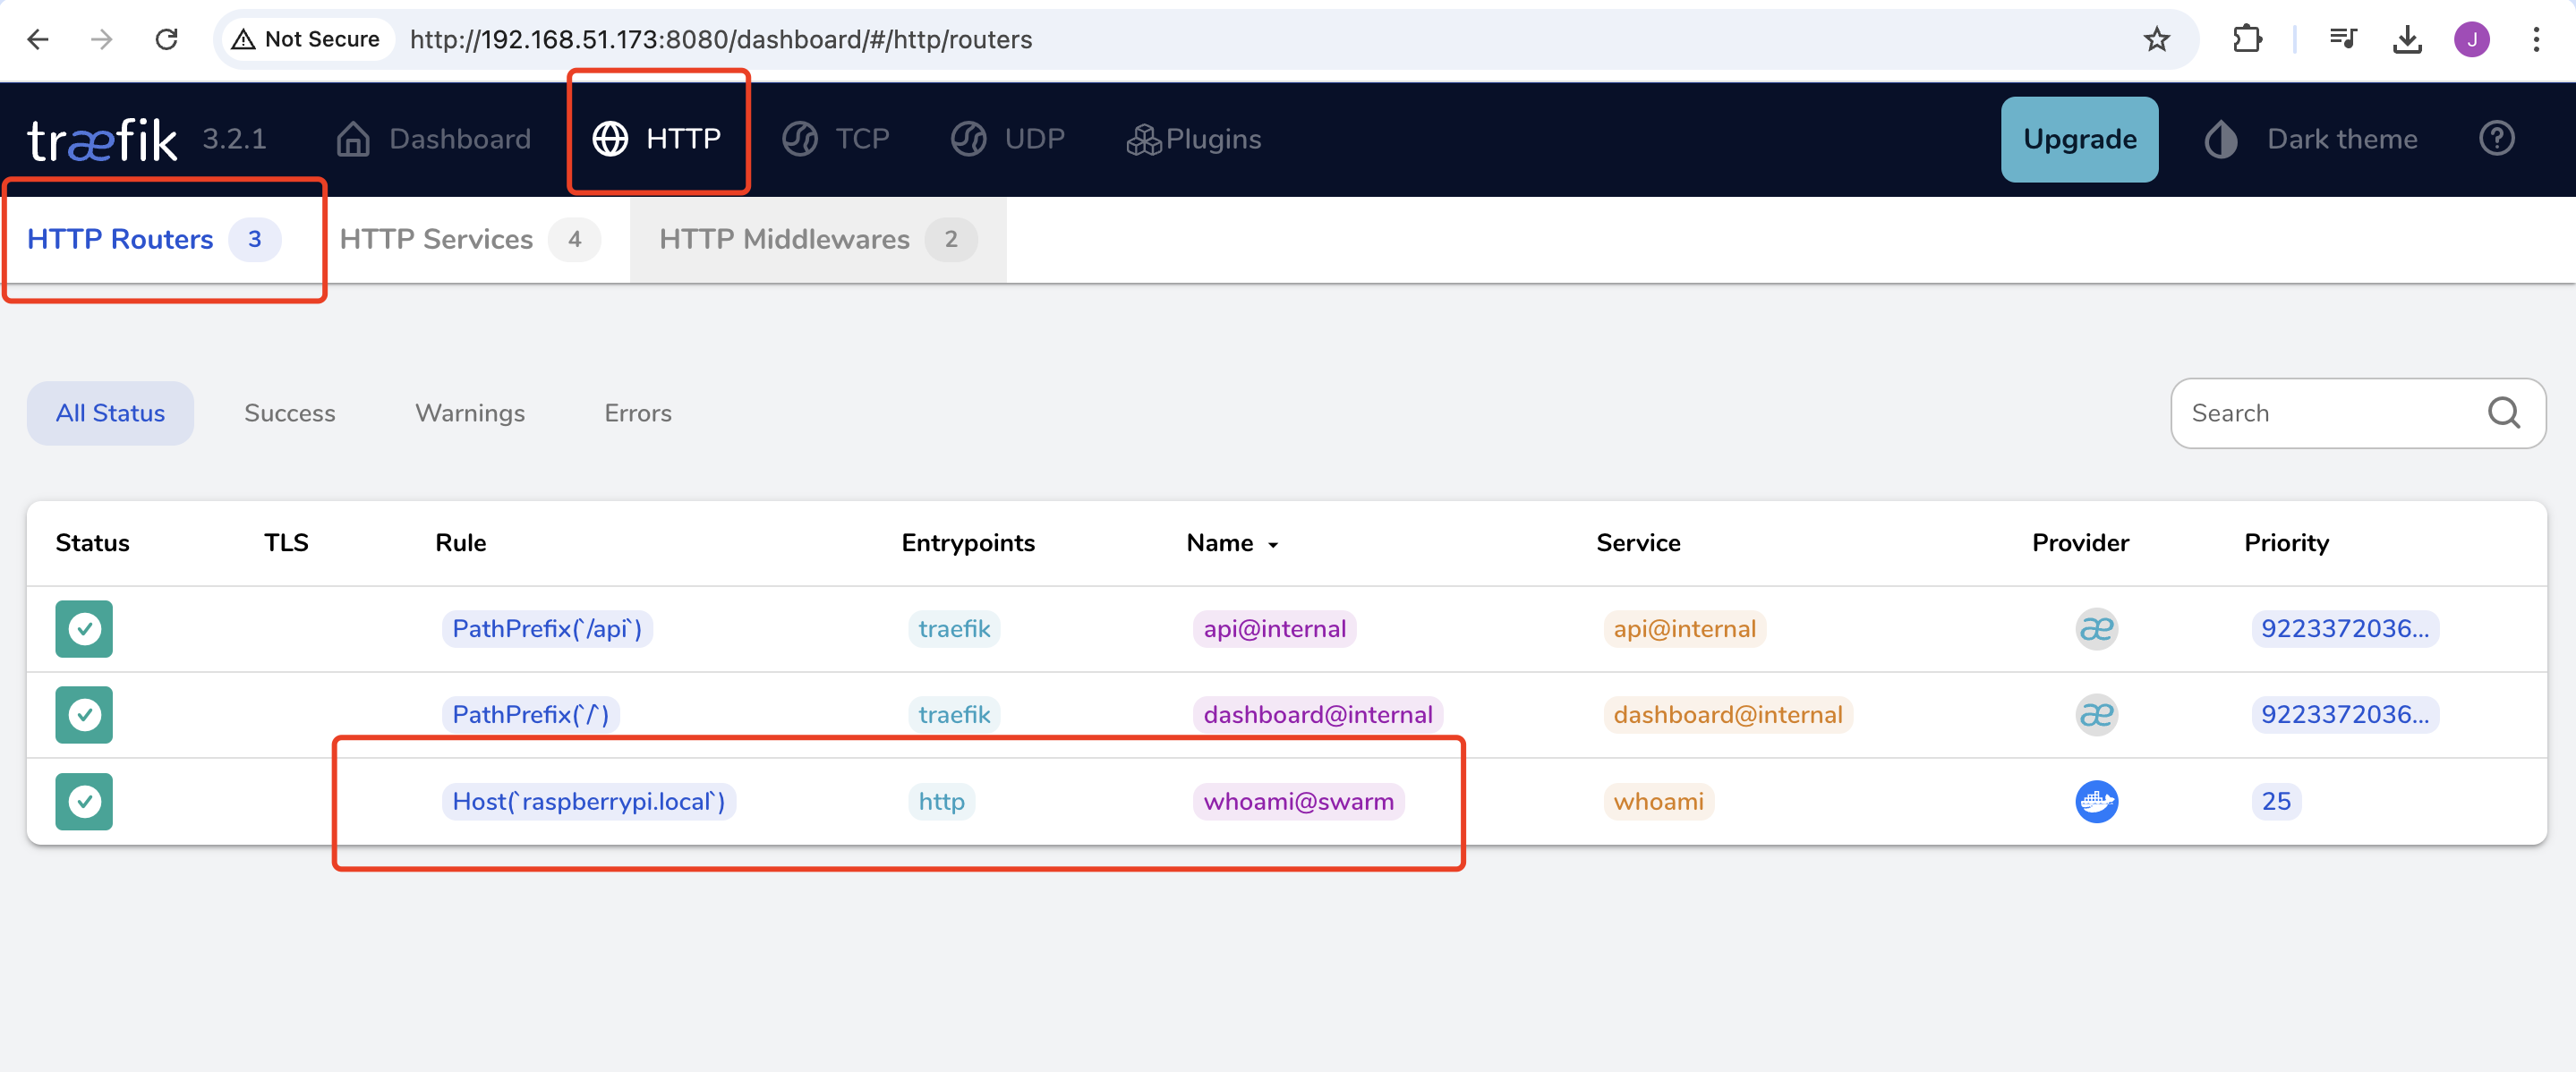
刷新 traefik 面板,就会看到 whoami 服务:
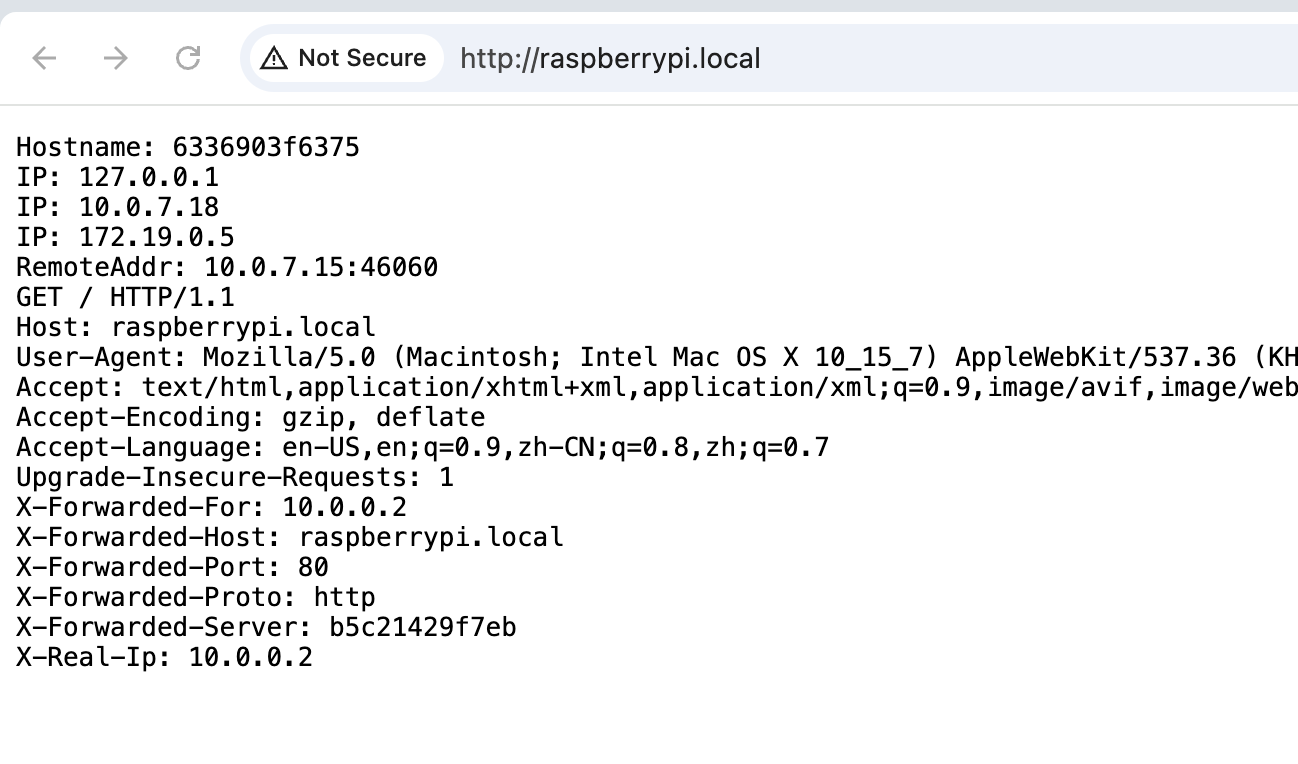
此时访问 http://raspberrypi.local/ 就会看到 whoami 服务的页面。
在官网的 Traefik Swarm 负载均衡配置 可以看到更多设置选项。
常见问题
deploy 后迟迟没有 Ready
比如 myweb_rpc 一直没有 Ready:
# 查看 Service 状态
docker service ls

ID             NAME                    MODE         REPLICAS   IMAGE                                                 PORTS
rfbhjyfbbpi7   gateway_reverse-proxy   replicated   1/1        traefik:v3.2                                          *:80->80/tcp, *:443->443/tcp, *:8080->8080/tcp
f3skw1nlkmjc   myweb_rpc               replicated   0/1        registry.cn-hangzhou.aliyuncs.com/knowuv/myweb:main
im3vz8qiasy1   portainer_agent         global       5/5        portainer/agent:2.19.5                                *:9001->9001/tcp

# 查看 Replicas 状态
docker service ps myweb_rpc
ID             NAME              IMAGE                                                 NODE             DESIRED STATE   CURRENT STATE            ERROR                              PORTS
3rtbe1uq6fys   myweb_rpc.1       registry.cn-hangzhou.aliyuncs.com/knowuv/myweb:main   raspi-worker01   Shutdown        Rejected 4 minutes ago   "No such image: registry.cn-ha…"
1kpfqi2gc5t7    \_ myweb_rpc.1   registry.cn-hangzhou.aliyuncs.com/knowuv/myweb:main   raspi-worker01   Shutdown        Rejected 4 minutes ago   "No such image: registry.cn-ha…"
t02z0wekh1n1    \_ myweb_rpc.1   registry.cn-hangzhou.aliyuncs.com/knowuv/myweb:main   raspi-worker02   Shutdown        Rejected 4 minutes ago   "No such image: registry.cn-ha…"
yxhshrctphmv    \_ myweb_rpc.1   registry.cn-hangzhou.aliyuncs.com/knowuv/myweb:main   raspi-worker01   Shutdown        Rejected 4 minutes ago   "No such image: registry.cn-ha…"
可以看到提示 "No Such Image",发现没有对应 arm/v8 的镜像,重新 build 并上传后解决。